The KPI’s (Key Performance Indicators) of a company are of immense importance for controlling. In most cases, these figures are collected in Excel tables or can be retrieved from multiple sources. In the broadest sense, this means additional work for those responsible, who have to screen these KPIs and subsequently prepare them for presentation.
The Scandio Atlassian Marketplace App PocketQuery for Confluence provides effective support for this. Once defined, this app allows you to repeat the same queries of data from external databases as often as you like and on a daily basis. Thus, the relevant KPI’s can be displayed on a Confluence page completely automatically and optically.
This How-To explains in 5 simple steps how to integrate PocketQuery for Confluence for this purpose.
1. Overview: How to create a Datasource
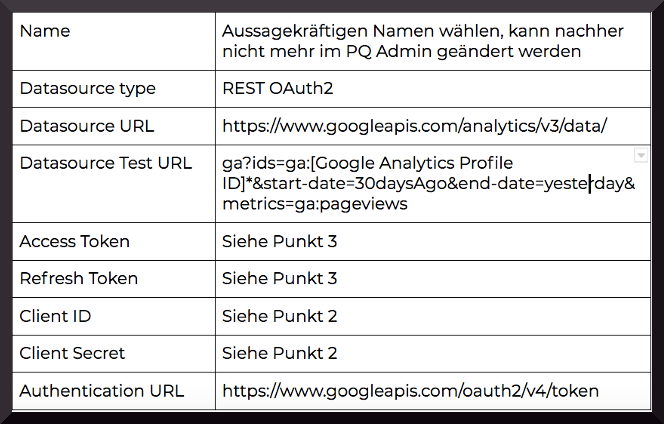
The table below lists the blocks that are required for the successful creation of a data source. The next four steps explain how to create these blocks.
2. How do I get a Client ID and a Client Key (Client Secret)?
- Invocation of the URL: https://console.developers.google.com/apis/dashboard to create a new project.https://console.developers.google.com/apis/dashboard to create a new project.
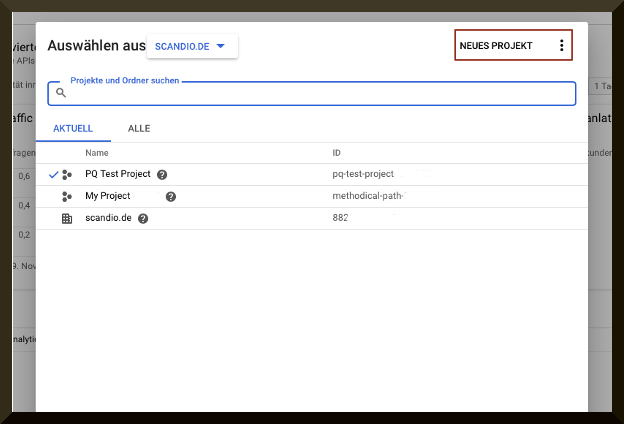
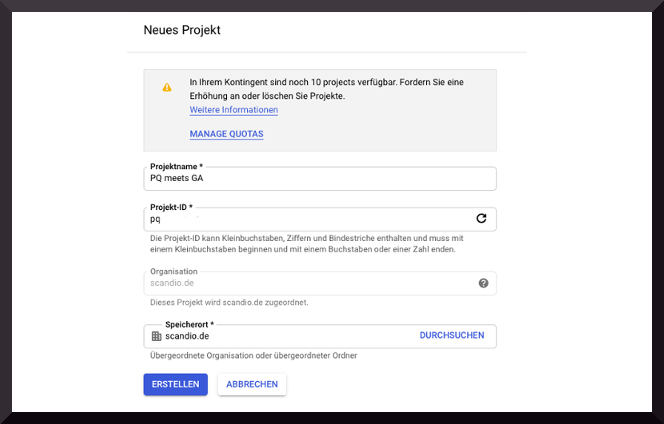
- Create a new project.
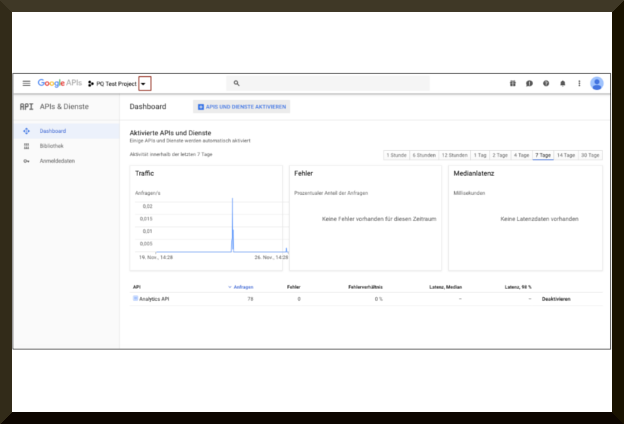
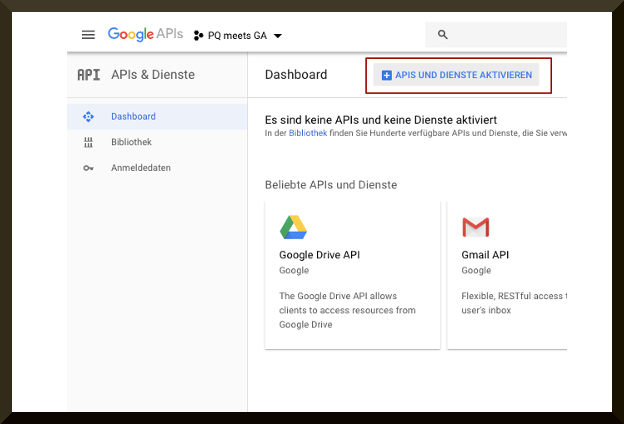
- Click on “Activate APIs and Services”.
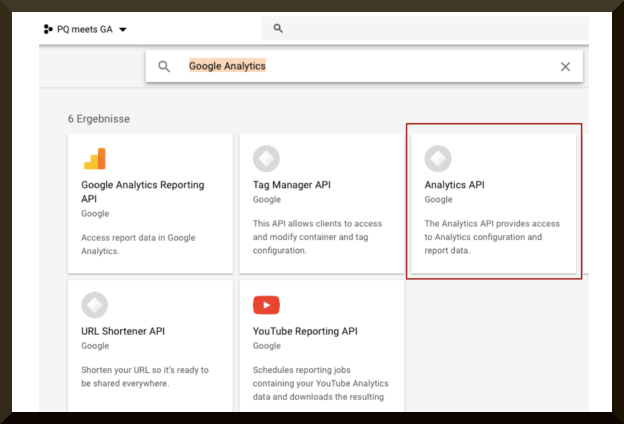
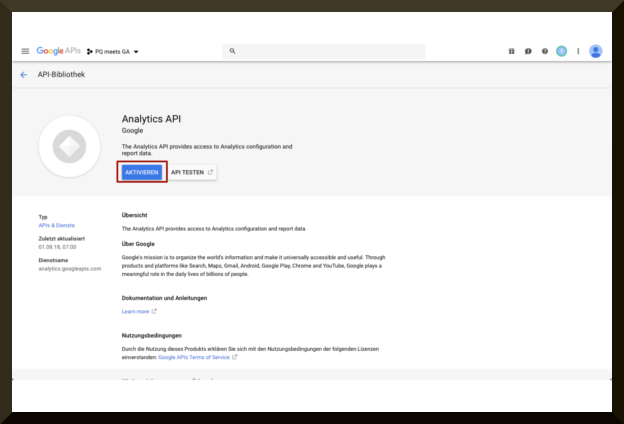
- Search for “Google Analytics” in the search field and select the third item there: “Analytics API”.
- Activate the API.
- Create credentials for this API by clicking “Create credentials”.
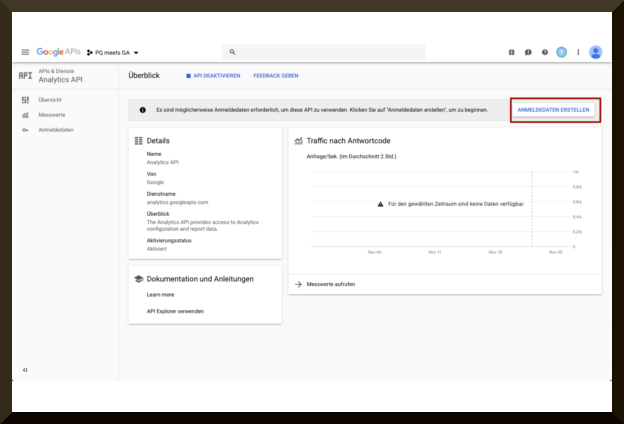
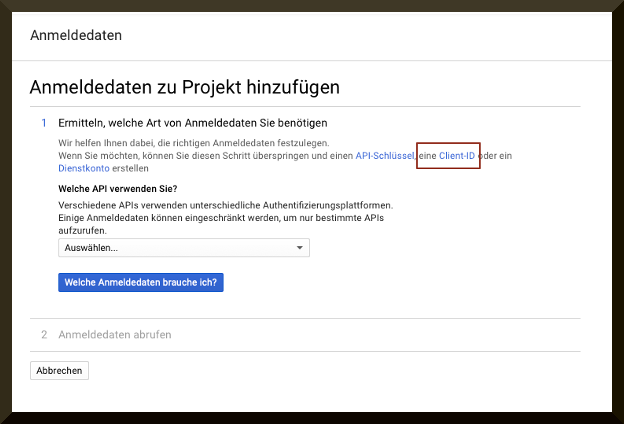
- Then follow the given link to get to the page shown below.
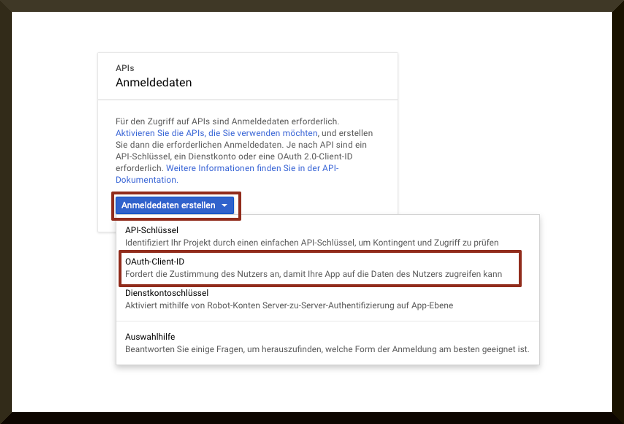
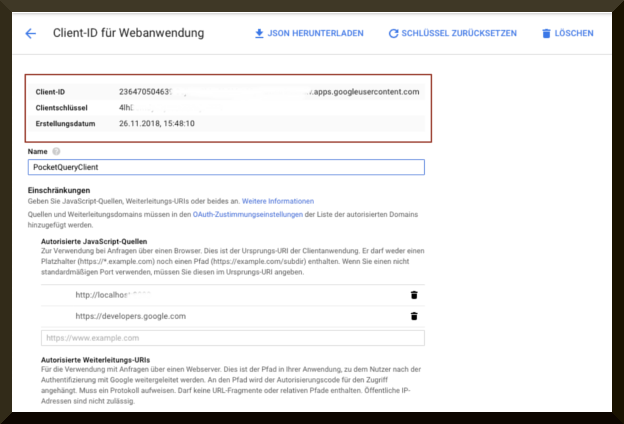
- Creating the Client ID: Select “OAuth Client ID” from the dropdown.

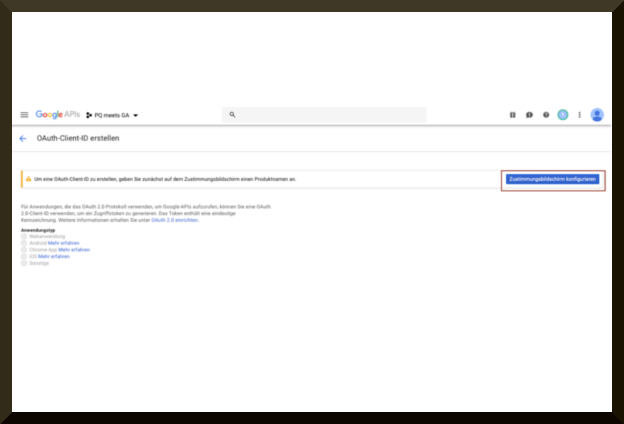
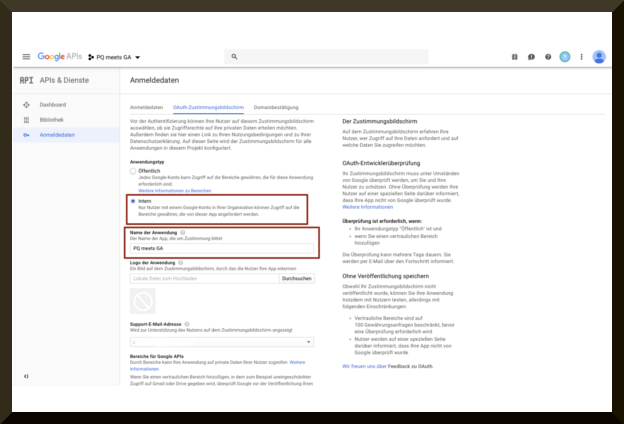
- Configure the approval screen: Select “Internal” application type. The “Application name” can be freely selected.

- Creating an OAuth Client: Specify the Web Application application type. The name can be freely chosen again.
- Specify the application URL (the URL on which PocketQuery will later run, e.g. your own Confluence instance) under “Authorized JavaScript Sources”.
- The redirection URL is the path in the application to which users are redirected after authentication with Google. Important for point 3, where we create an access and refresh token.
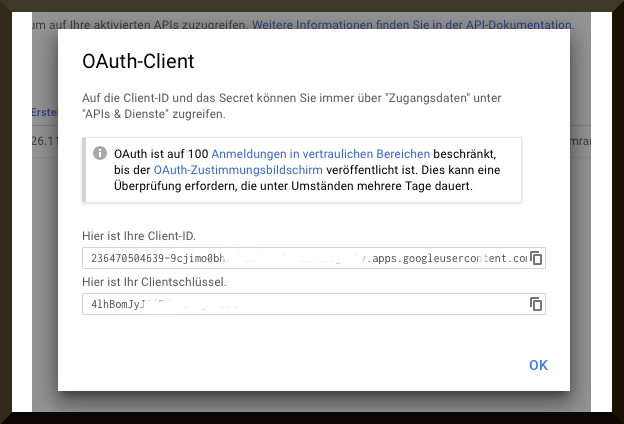
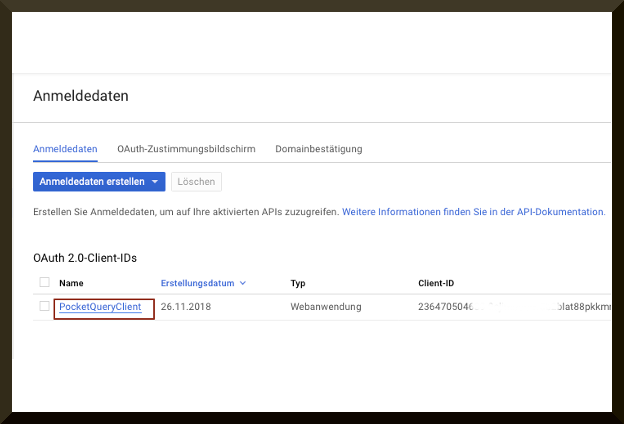
Note To view the client ID and client key later, simply select the appropriate web application under "credentials".
3 How do I generate an Access and a Refresh Token?
- Send a GET request in a new tab:
Example:
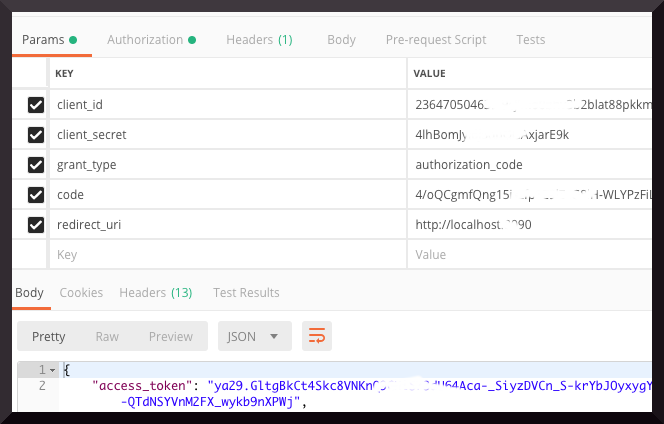
- In the following, the request was broken down into its individual parts for better understanding:
The client_id=[CLIENT ID, generated in step 2
The local test instance
Note In this step, both "prompt" and "access_type" must be set, otherwise the next step only generates an access token, but no refresh token.
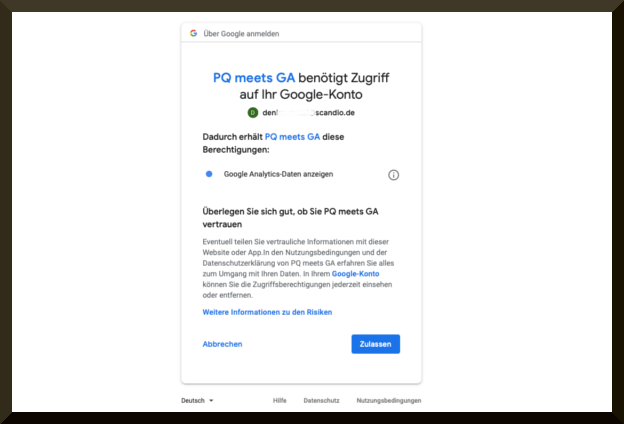
- Use the login dialog to log in with a Google Account, followed by the OAuth approval screen.
- Forwarding to “redirect_uri” (in this case “http://localhost:8090”)
Note If you are working with your own test instance, make sure you are logged in, otherwise the Authorization Code is URL-encoded (cryptic) and has to be decoded for use with Postman.
- The following URL now appears in the browser:
This is the authorization code needed to create an access and a refresh token.
- Create a POST request with https://www.googleapis.com/oauth2/v4/token to create a new project, for example with the Postman tool.
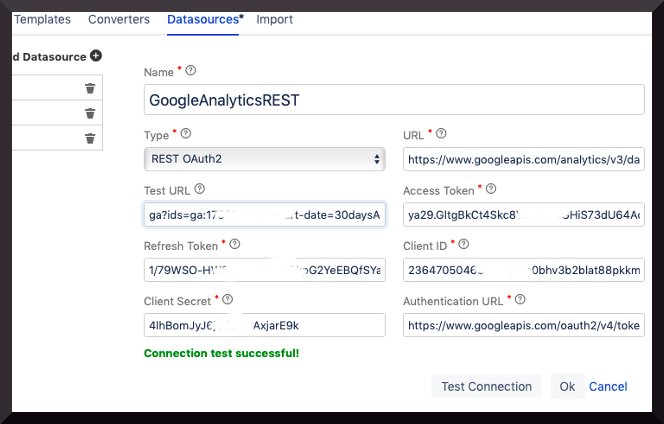
- It is now possible to create a data source in PocketQuery. See the picture below for an example:
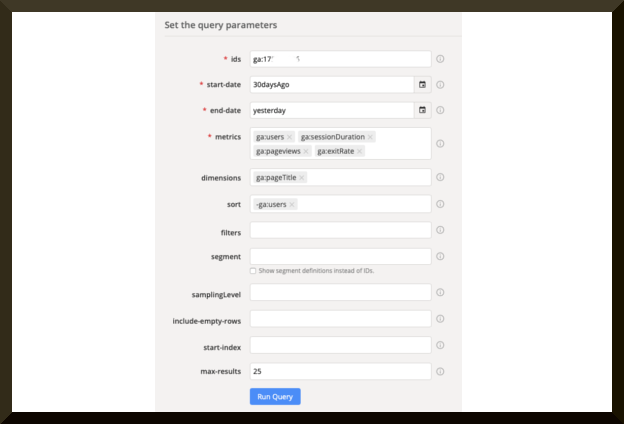
4 How do I create a query and what is my REST URL or which parameters do I query?
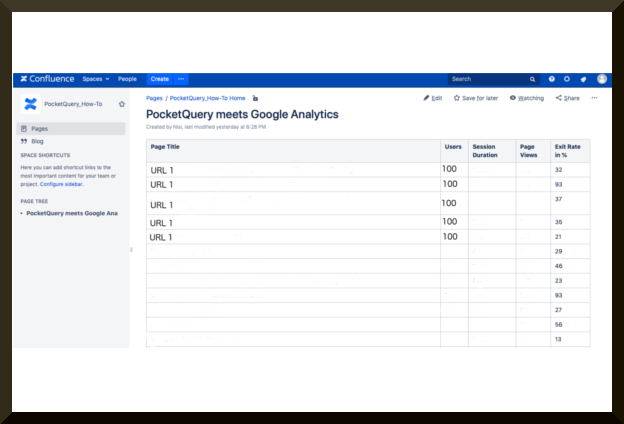
- We have used the following parameters for this example:
- Page Title
- users
- Session Duration
- page views
- % Exit
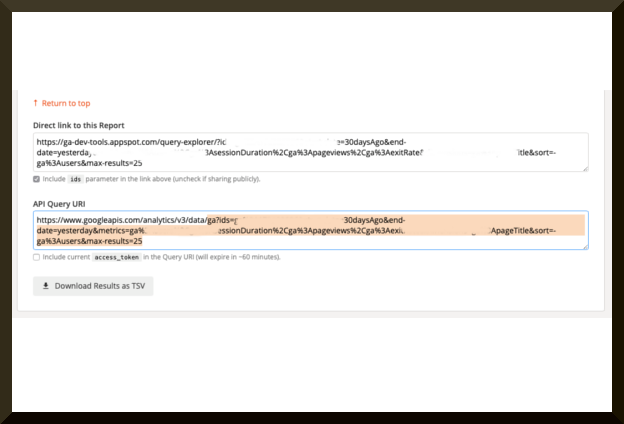
Note Further paramater options are available under https://ga-dev-tools.appspot.com/query-explorer/ and can be copied with the extension "API Query URI" from "ga?ids..." and inserted into PocketQuery by a query as REST URL.

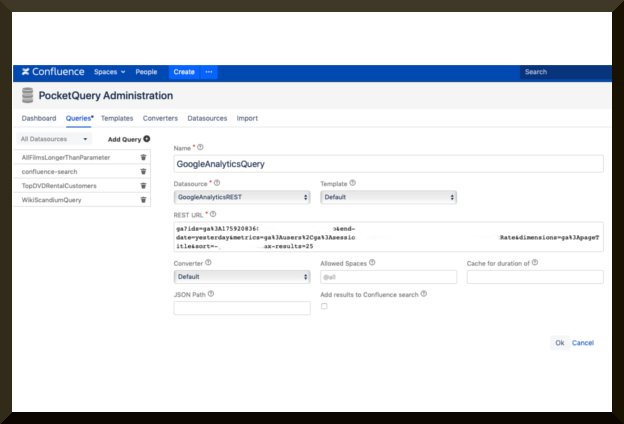
- Necessary specifications when creating a query:
- Name
- Datasource
- Template
- REST URL
- Converter
- Allowed Spaces
- Cache for Duration
- JSON Path
- Add results to Confluence search
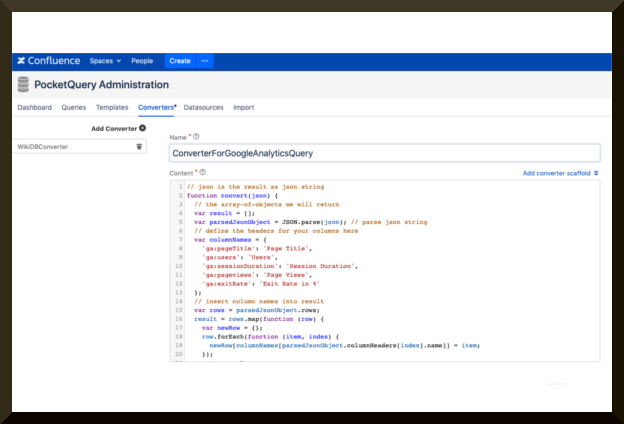
5 What does my converter have to look like and what does it have to contain in order for my content to be displayed properly on a Confluence page?
- Inserting the PocketQuery macro on a Confluence page:
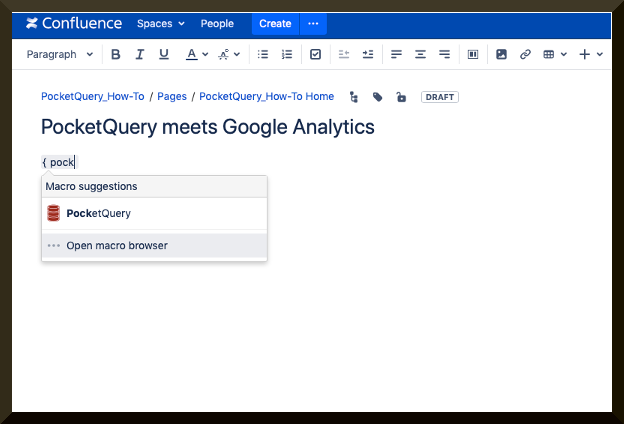
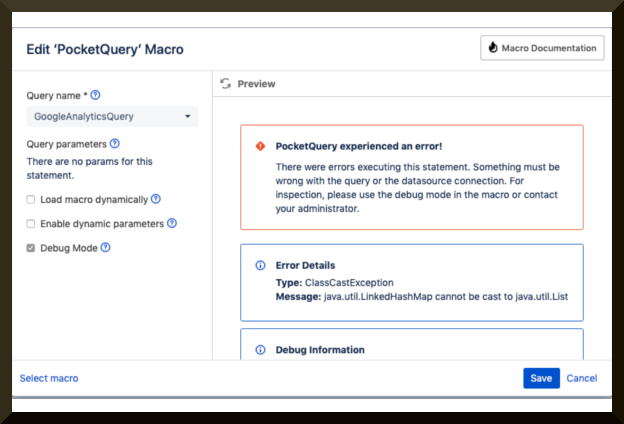
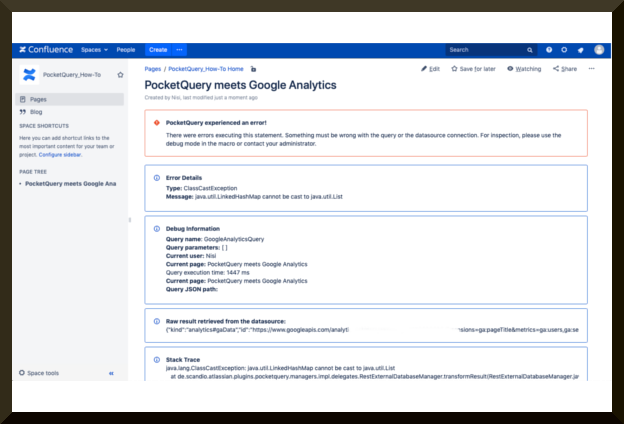
Note This step is followed by an error message. This will be corrected by the following step.
- Since PocketQuery works with arrays as response, the result of the query must be adjusted by a converter. Under “// define the headers for your columns here” you must always specify the exact headers of the individual columns. Later these will be included in the result.
Conclusion
The API created for Google Analytics can now be retrieved, modified and parameters adjusted as required.
Where to go?
- Download PocketQuery for Confluence from the Atlassian Marketplace and leave a review.
- Read PocketQuery for Confluence documentation and learn about the latest features.
- Contact ussupport@livelyapps.com.com.

.png)


.png)
.png)
.png)